

Introduction
Are you looking to give your bathroom a fresh, modern look without breaking the bank? Wet wall installation might be the perfect solution for you. This innovative approach to bathroom design has been gaining popularity among homeowners and designers alike, offering a sleek, low-maintenance alternative to traditional tiling. In this comprehensive guide, we’ll walk you through everything you need to know about wet wall installation, from its benefits to the step-by-step process of bringing this stylish upgrade to your own bathroom.

What Exactly is a Wet Wall?
Before we dive into the installation process, let’s clarify what we mean by a “wet wall.” In bathroom design, a wet wall refers to a waterproof panel system that covers the walls of your shower, bathtub area, or entire bathroom. These panels are typically made from materials like PVC, acrylic, or laminate, and are designed to be completely waterproof and easy to clean.
Key Features of Wet Walls:
Waterproof and moisture-resistant
Easy to clean and maintain
Available in a wide range of colors and designs
Quick to install compared to traditional tiling
Can be installed over existing tiles or on bare walls

The Benefits of Choosing Wet Wall Panels
1. Cost-Effective Solution
One of the primary reasons homeowners opt for wet wall installation is its cost-effectiveness. Compared to traditional tiling, wet wall panels are often more affordable, both in terms of materials and installation costs. This makes them an attractive option for those looking to update their bathroom on a budget.
2. Quick and Easy Installation
Time is money, and Wet wall installation can save you plenty of both. Unlike tiling, which can take days or even weeks to complete, wet wall panels can often be installed in just a day or two. This means less disruption to your daily routine and a faster transformation of your bathroom space.
3. Low Maintenance
Let’s face it: cleaning grout lines is nobody’s idea of a good time. With wet wall panels, you can say goodbye to scrubbing stubborn grout and hello to easy maintenance. A simple wipe-down with a damp cloth is usually all it takes to keep your wet walls looking pristine.
4. Versatile Design Options
Gone are the days when wet walls were limited to plain, clinical-looking panels. Today’s wet wall options come in a vast array of colors, patterns, and textures. Whether you’re aiming for a sleek, modern look or a more traditional feel, you’re sure to find a design that suits your taste.
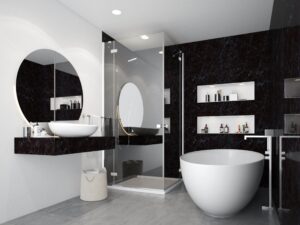
Preparing for Wet Wall Installation
Before you begin the installation process, it’s crucial to properly prepare your bathroom. This preparation phase can make the difference between a smooth installation and potential headaches down the line.
1. Assess Your Current Bathroom
Start by taking a good look at your existing bathroom walls. Are they in good condition, or do they need some work? Wet wall panels can be installed over existing tiles, but if your walls are damaged or have mold issues, it’s best to address these problems first.
2. Measure Your Space
Accurate measurements are key to a successful Wet wall installation. Measure the height, width, and depth of the areas where you plan to install the panels. Don’t forget to account for any windows, doors, or fixtures that might affect your measurements.
3. Choose Your Panels
With your measurements in hand, it’s time to select your wet wall panels. Consider factors like color, texture, and panel thickness. Thicker panels (around 10mm) are generally more durable and provide better insulation, but they may be more challenging to cut and install.
4. Gather Your Tools
Before you start, make sure you have all the necessary tools on hand. You’ll typically need:
A saw (either a handsaw or power saw, depending on the panel material)
Adhesive and sealant
A caulking gun
A level
Measuring tape
Pencil for marking
Cleaning supplies

The Wet Wall Installation Process
Now that you’re prepared, let’s walk through the installation process step by step.
1. Clean and Prep the Walls
Start by thoroughly cleaning your existing walls. Remove any dirt, grease, or loose material. If you’re installing over tiles, make sure they’re securely attached to the wall. For bare walls, you may need to apply a primer or sealant to ensure proper adhesion.
2. Plan Your Layout
Before cutting any panels, plan out how they’ll fit in your space. Start from a corner and work your way out, making sure to account for any fixtures or outlets. It’s often helpful to draw a rough sketch of your layout.
3. Cut the Panels
Using your measurements and layout plan, cut the panels to size. Remember the old carpenter’s adage: measure twice, cut once. Take your time with this step to ensure accurate cuts, especially around fixtures and outlets.
4. Apply Adhesive
Apply a generous amount of panel adhesive to the back of your first panel. Use a zigzag pattern to ensure even coverage. Be sure to use an adhesive specifically designed for wet wall panels.
5. Install the Panels
Carefully position the first panel in place, pressing firmly to ensure good contact with the adhesive. Use a level to make sure it’s straight. Continue this process with the remaining panels, making sure to leave a small gap (about 3-4mm) between panels for expansion.
6. Seal the Joints
Once all panels are in place, it’s time to seal the joints. Use a waterproof sealant in a color that matches your panels. Apply the sealant carefully along each joint, smoothing it with your finger or a suitable tool for a neat finish.
7. Finishing Touches
After the sealant has dried, give your new wet walls a final clean. You may also want to add trim pieces around the edges for a polished look.

Maintaining Your Wet Walls
One of the great advantages of wet walls is their easy maintenance. To keep your new bathroom looking its best:
Regularly wipe down the panels with a soft cloth and mild detergent
Avoid using abrasive cleaners or scrub brushes, which can scratch the surface
Check the sealant periodically and reapply if necessary to maintain waterproofing
Conclusion
Wet wall installation offers a modern, cost-effective way to transform your bathroom. With their quick installation, low maintenance requirements, and wide range of design options, it’s no wonder that more and more homeowners are choosing wet walls over traditional tiling. By following this guide, you’ll be well-equipped to tackle your own wet wall installation project, creating a beautiful, durable bathroom space that you’ll enjoy for years to come.
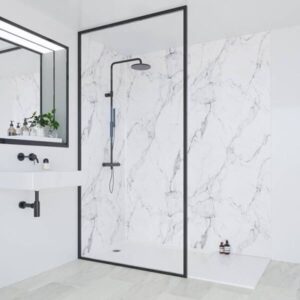
Remember, while wet wall installation can be a DIY project, don’t hesitate to consult with a professional if you’re unsure about any part of the process. The key is to end up with a bathroom that’s not only stylish but also properly waterproofed and built to last. Happy renovating!

